Today, we’re going to learn how to draw a Bed. Follow this simple step-by-step tutorial to create your very own bed drawing. Grab your pencils and let’s get started.
Table of Contents
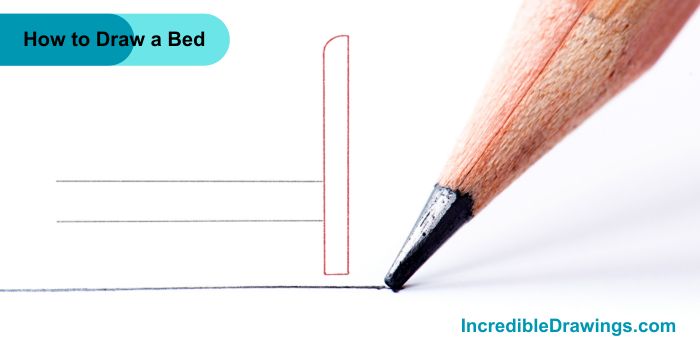
Step 1: Draw the Base
- Start by drawing two horizontal lines across your paper. These will be the base of your bed.

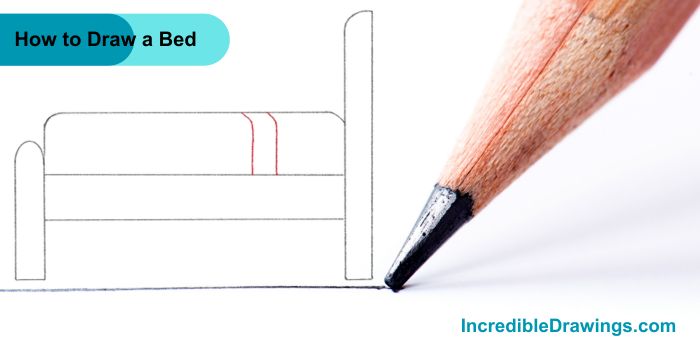
Step 2: Add the Headboard
- On the right side of your bed, draw a tall rectangle shape. This is the headboard. Make sure it’s taller than your bed base.
Step 3: Draw the Footboard
- On the left side of your bed, draw a smaller rectangle. This is the footboard. It should be shorter than the headboard.

Step 4: Create the Mattress
- Now, let’s add the mattress. Draw a curved line connecting the top of the footboard to the top of the headboard. This shows the soft, comfy top of your bed.

Step 5: Add Some Details
- To make your bed look more realistic, draw two small vertical lines near the right side of the mattress. These represent folds in the bedding.
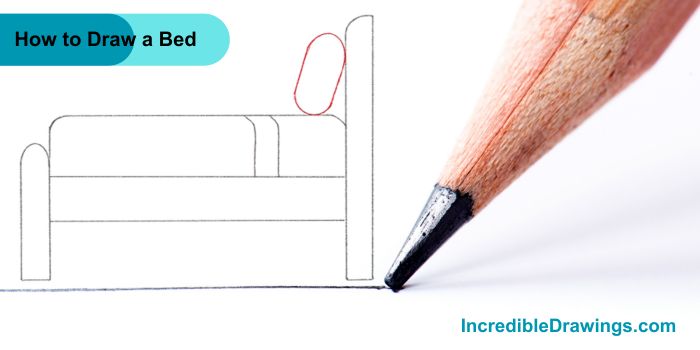
Step 6: Draw the pillow
- At the right end of the bed, near the headboard, draw an oval shape. This is your pillow.
- Make sure it’s sitting on top of the mattress.
Step 7: Color it in (optional)
- If you want to add color, you can use brown for the bed frame.
- Make the mattress light blue.
- Color the blanket dark blue.
- Use light blue for the pillow.

And there you have it, You’ve drawn a comfy-looking bed. Remember, practice makes perfect, so don’t worry if it doesn’t look exactly like the picture. Keep trying, and you’ll get better each time. I hope you like drawing this bed with us.
The admin of IncredibleDrawings.com is an expert in creating step-by-step drawing tutorials for kids and artists. With over 4+ years of Experience, degree from Master of Fine Arts (MFA), I have cultivated a substantial following on YouTube, Pinterest, and Facebook, making art accessible to learners of all ages. Explore engaging drawing guides and tutorials on their YouTube channel with over 29k subscribers, follow inspiring content on Pinterest, with 100K Monthly views and connect with a vibrant artist community on Facebook with 2k+ likes.