Table of Contents
Step 1: Drawing the Eyes
- Start by drawing the eyes. Sketch two almond-shaped eyes using lines that point at the corners.
- Draw two partial circles inside each eye for the pupils and shade them.
- Add a curved line above each eye for the eyelids.

Step 2: Adding the Eyebrows and Nose
- Draw the bushy eyebrows with curved lines.
- Sketch the furrow between the eyebrows and the bridge of the nose.
- Add the nostrils and the tip of the nose.
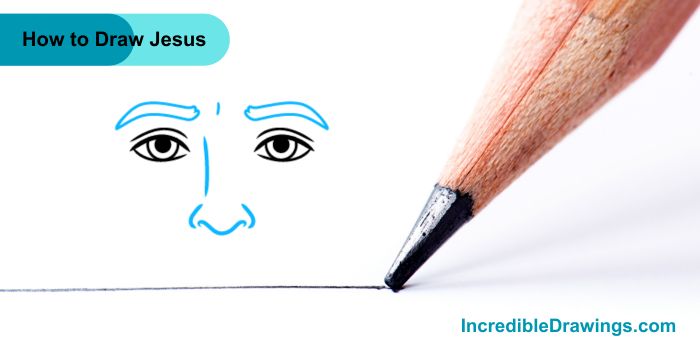
Step 3: Drawing the Lips and Beard Texture
- Use curved lines to draw the lips.
- Sketch the texture of the beard with a series of connected lines of different lengths that meet at points.
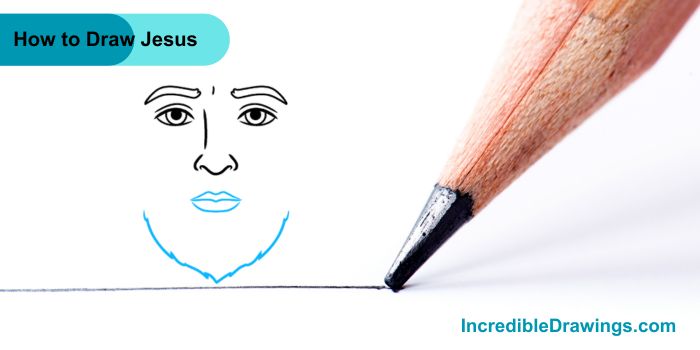
Step 4: Drawing the Beard and Mustache
- Continue using curved lines to draw the top and sides of the beard.
- Add the mustache and beard around the mouth.
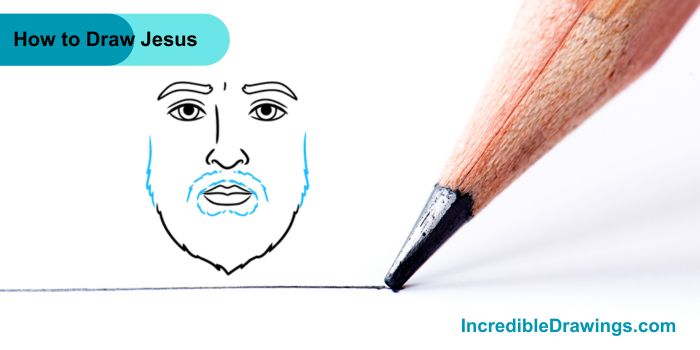
Step 5: Drawing the Cheek Beard and Hairline
- Draw the top of the beard along the cheeks with short curved lines.
- Add more lines to texture the length of the beard.
- Draw long, sweeping “M”-shaped lines above the head for the hairline.
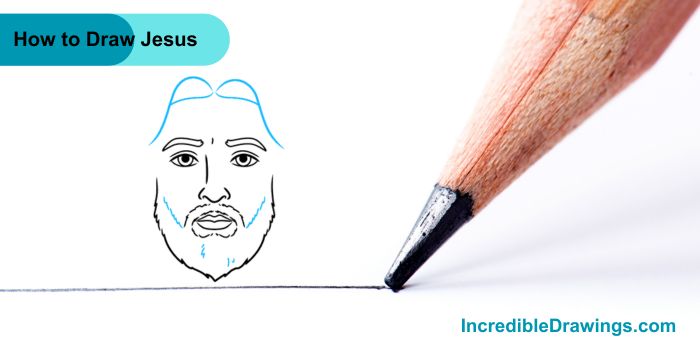
Step 6: Adding the Hair and Ears
- Use long curved lines to draw the hair, making sure the lines overlap for volume.
- Sketch the ears between the hair and the face.
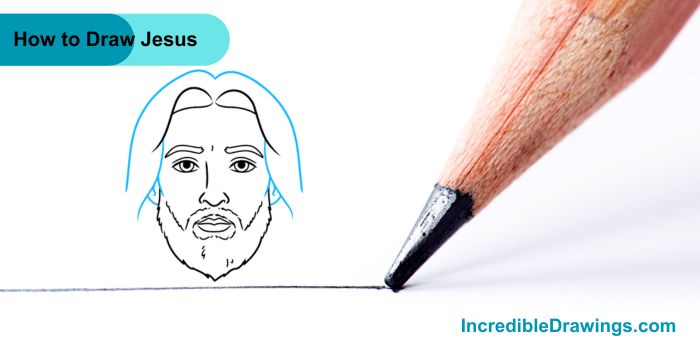
Step 7: Extending the Hair
- Continue drawing overlapping curved lines to make the hair long.
- Let the lines meet at the bottom to form pointed locks.
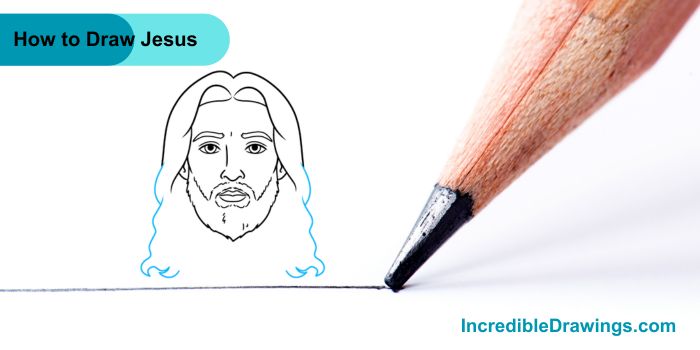
Step 8: Finishing the Hair and Adding Details
- Finish enclosing the hair with lines that meet at points to form locks.
- Use additional curved lines to texture the hair part, and draw the neck and garments.
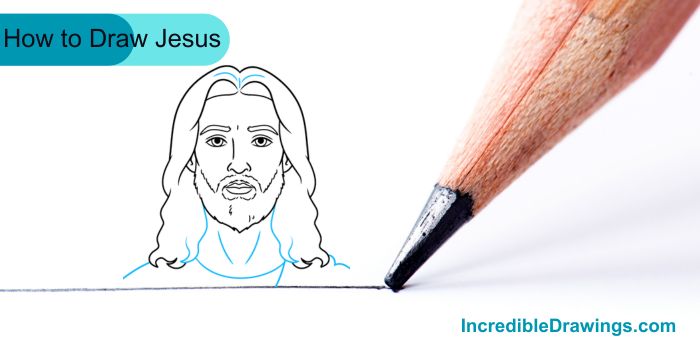
Step 9: Adding Final Touches
- Complete the drawing by texturing the hair and clothing with curved lines.

Step 10: Adding Color to Your Drawing
- Color the Hair: Use shades of brown to bring depth and dimension to Jesus’ hair. Start with a base color and add darker shades for shadows and lighter tones for highlights.
- Color the Skin: Select a natural skin tone like beige or tan. Apply the color evenly across the face, ears, and neck. Use a slightly darker shade for shadows under the eyes, nose, and jawline to add depth.
- Color the Clothes: Use white for the garments to create a clean and symbolic look. Add shading to show folds and wrinkles, enhancing the realism of the clothing.

There you have it—a complete guide to draw Jesus Step by Step. By following these steps and adding color with care, you can create a detailed depiction. I hope you like drawing Jesus with us in this step-by-step guide.
If you like this step-by-step drawing, you might also like this: How to Draw a Shivaji Maharaj Face (Step by Step)
The admin of IncredibleDrawings.com is an expert in creating step-by-step drawing tutorials for kids and artists. With over 4+ years of Experience, degree from Master of Fine Arts (MFA), I have cultivated a substantial following on YouTube, Pinterest, and Facebook, making art accessible to learners of all ages. Explore engaging drawing guides and tutorials on their YouTube channel with over 29k subscribers, follow inspiring content on Pinterest, with 100K Monthly views and connect with a vibrant artist community on Facebook with 2k+ likes.

