Today, we’ll learn how to draw a wolf step by step, one of the most majestic creatures in the animal kingdom. With easy-to-follow instructions and clear images, you’ll be able to create your own wolf drawing in no time.
Table of Contents
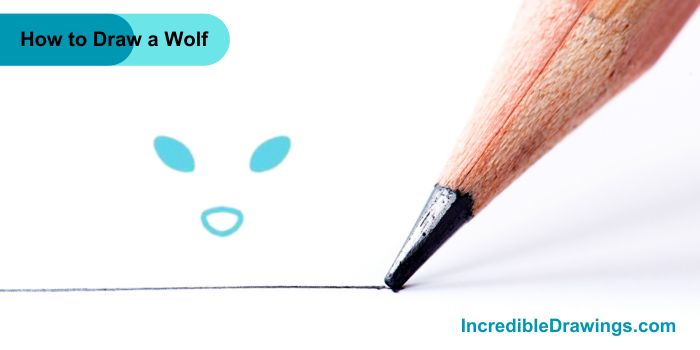
Step 1: Draw the Eyes and Nose
- Start by drawing two almond-shaped eyes. Then, draw a small oval for the nose just below the eyes.
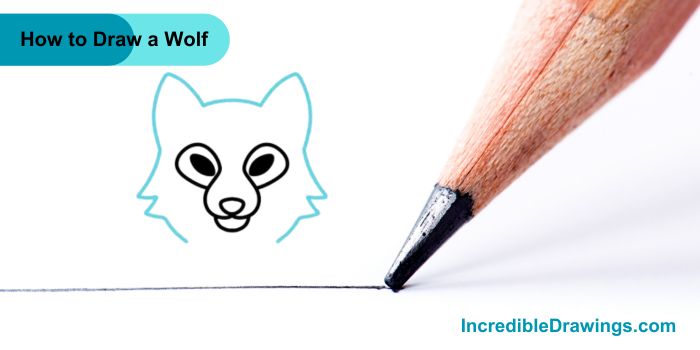
Step 2: Add the Mouth and Ears
- Next, draw the wolf mouth by adding a curved line below the nose. Draw two large ovals on top of the head for the ears.

Step 3: Outline the Head
- Now, draw the outline of the wolf head around the eyes, nose, and ears. Make sure to add some zigzag lines on the sides to represent the fur.
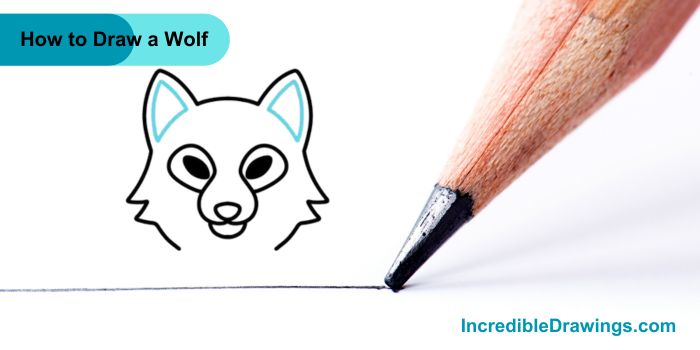
Step 4: Add Details to the Ears
- Add small triangles inside the ears for the inner ear details. This will give the wolf’s ears a more realistic look.
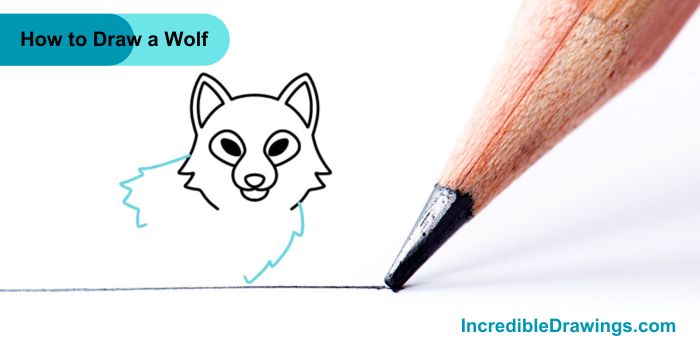
Step 5: Draw the Neck and Chest Fur
- Draw a fluffy zigzag line starting from the sides of the head to create the wolf neck and chest fur.
Step 6: Sketch the Body Outline
- Extend two curved lines from the bottom of the chest to form the body. Make sure the lines are parallel and slightly curved.
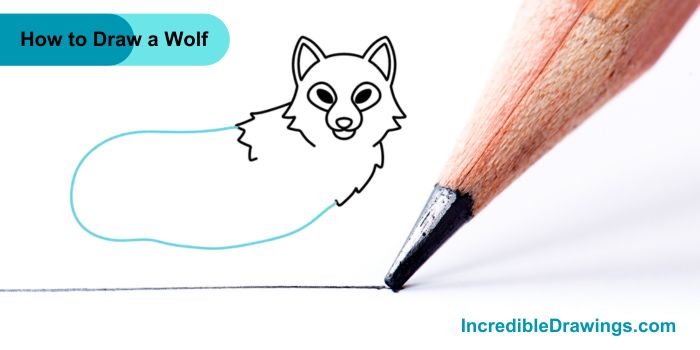
Step 7: Add the Legs
- Draw four legs extending from the body. The front legs should be straight, while the back legs should be slightly bent at the joints.
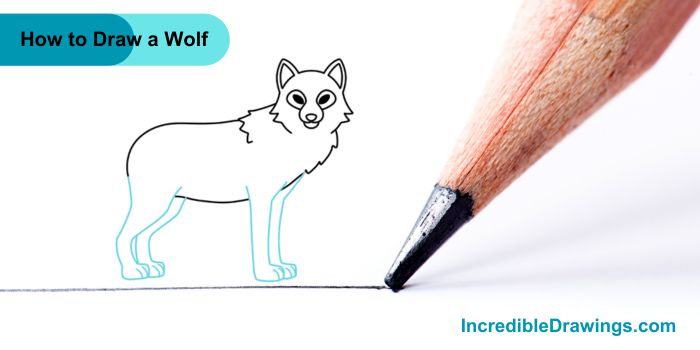
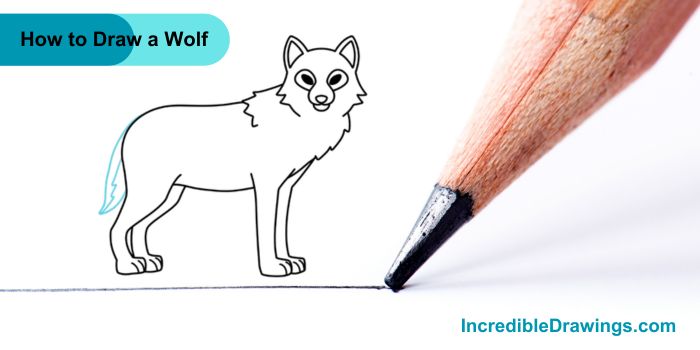
Step 8: Draw the Tail
- Add a tail by drawing a curved line extending from the back of the wolf. Make the tail fluffy with some zigzag lines.
Step 9: Color Your Wolf
- Now, it’s time to color your wolf! Use shades of grey, white, and black to give your wolf a realistic look. You can also use any other colors you like to make your wolf unique.

Great job, You’ve drawn an amazing wolf. Remember, practice makes perfect, so keep drawing and have fun. I hope you like drawing wolf with us.
The admin of IncredibleDrawings.com is an expert in creating step-by-step drawing tutorials for kids and artists. With over 4+ years of Experience, degree from Master of Fine Arts (MFA), I have cultivated a substantial following on YouTube, Pinterest, and Facebook, making art accessible to learners of all ages. Explore engaging drawing guides and tutorials on their YouTube channel with over 29k subscribers, follow inspiring content on Pinterest, with 100K Monthly views and connect with a vibrant artist community on Facebook with 2k+ likes.