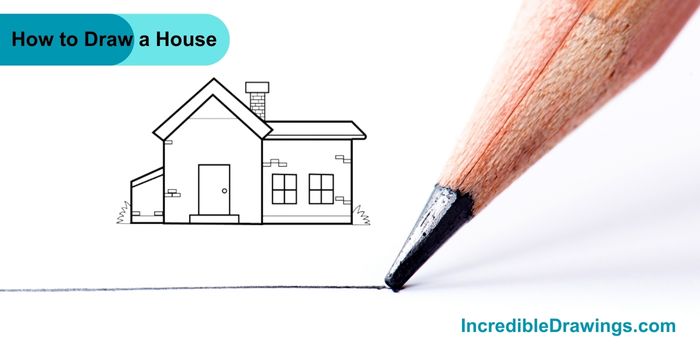
Drawing a house can be fun and easy, Follow this step by step guide on how to draw a house, and you’ll have your house drawing in no time. Let’s get started.
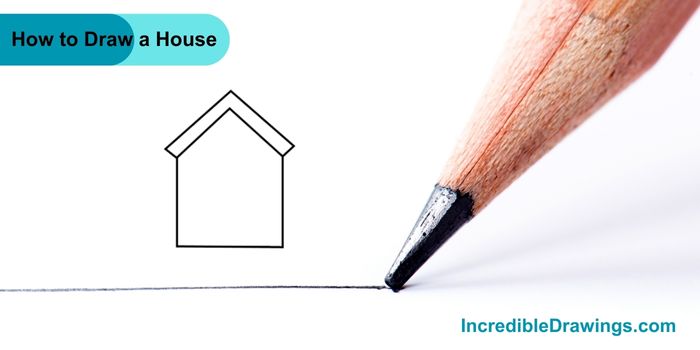
Step 1: Draw the Basic Shape
- Start by drawing a simple house shape. Draw a square with a triangle on top to form the basic outline of the house.

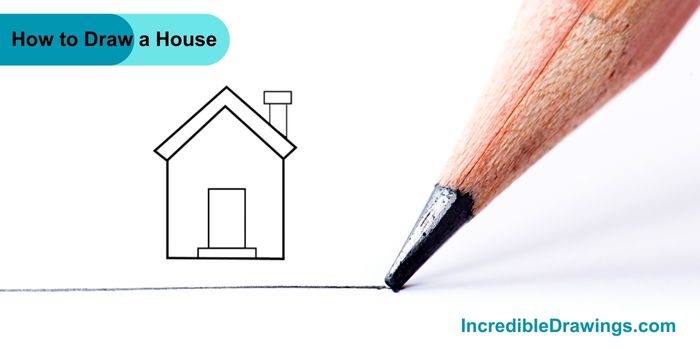
Step 2: Add the Roof Outline
- Next, add a second outline to the roof. Draw another triangle slightly above the first one and connect the edges to the sides of the house. This will give the roof a nice, finished look.
Step 3: Draw the Chimney and Door
- Now, draw a chimney on the right side of the roof by adding a small rectangle. Then, draw a door in the middle of the house. Make sure the door is centered and add a small step at the bottom.
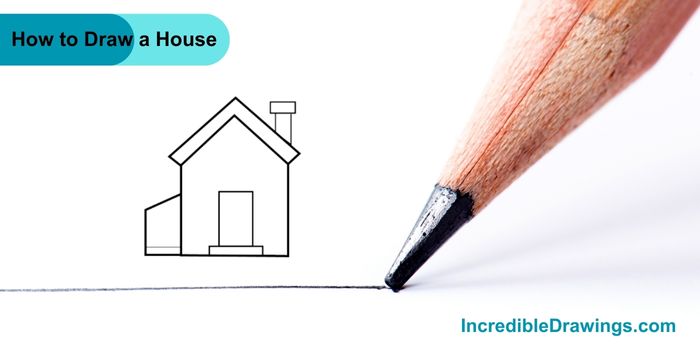
Step 4: Add a Side Structure
- Draw a small rectangular structure on the left side of the house. This could be a garage or an additional room.
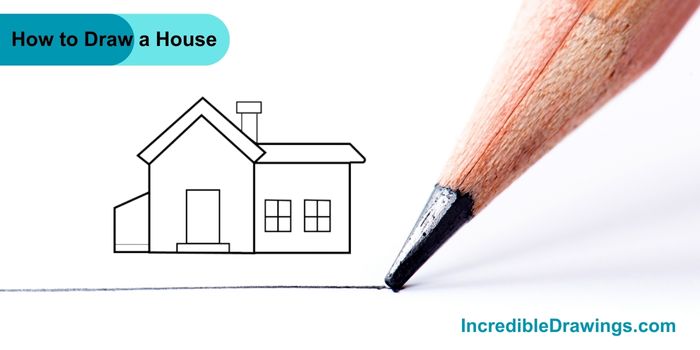
Step 5: Add Windows and Details
- Add windows to your house. Draw two squares on the right side of the house. Add lines inside each square to create window panes.
Step 6: Complete the Roof and Chimney Details
- Draw some details on the roof and chimney. You can add bricks to the chimney and lines on the roof to give it a tiled look. Also, add details like a doorknob to the door.

Step 7: Add Final Touches
- Add final touches like some bricks on the walls and a bit of grass around the house to make it look more realistic and detailed.
Step 8: Color Your House
- Finally, color your house, You can use any colors you like to make your house look bright and beautiful. Don’t forget to color the roof, door, windows, and any other details you added.

Congratulations, You’ve drawn a beautiful house. Keep practicing, and soon you’ll be able to draw even more amazing things. I hope you like drawing house with us.
The admin of IncredibleDrawings.com is an expert in creating step-by-step drawing tutorials for kids and artists. With over 4+ years of Experience, degree from Master of Fine Arts (MFA), I have cultivated a substantial following on YouTube, Pinterest, and Facebook, making art accessible to learners of all ages. Explore engaging drawing guides and tutorials on their YouTube channel with over 29k subscribers, follow inspiring content on Pinterest, with 100K Monthly views and connect with a vibrant artist community on Facebook with 2k+ likes.