Drawing a bird can be a fun and simple activity. Follow this step by step guide on how to draw a bird to create your very own bird drawing. Each step builds upon the previous one, so take your time and have fun!
Table of Contents
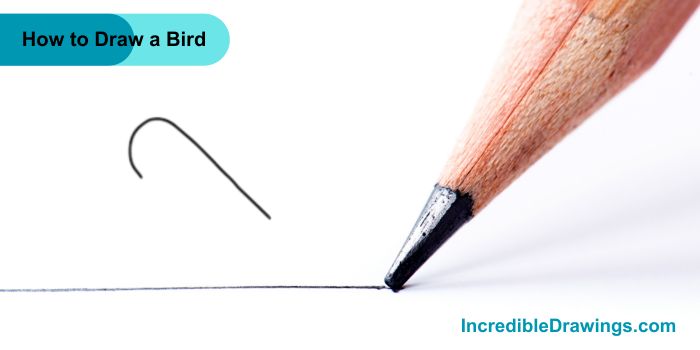
Step 1: Draw the Beak and Head Outline
- Start by drawing a curved line that looks like the letter “J”. This will be the beak and part of the head of the bird.
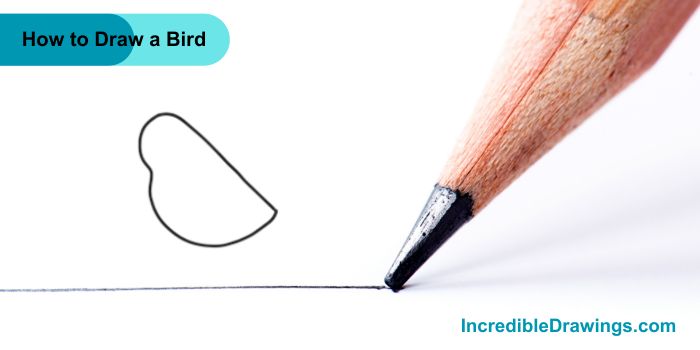
Step 2: Add the Body Outline
- Next, draw a larger curved line starting from the head and curving down to form the body. It should look like a big, rounded shape.
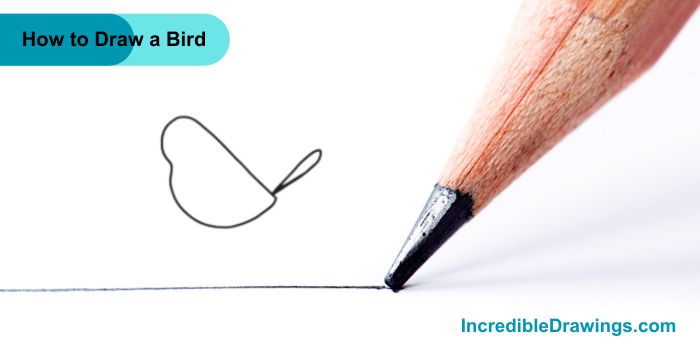
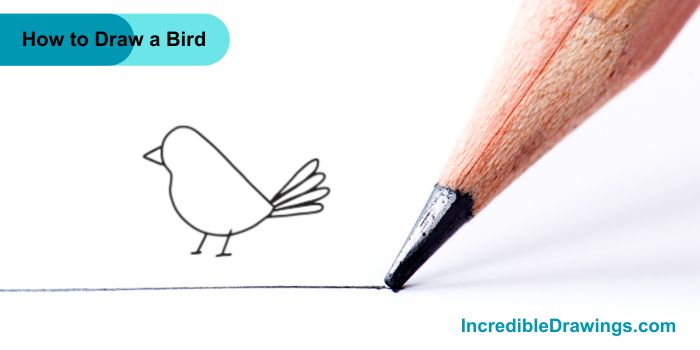
Step 3: Draw the Tail
- Add a small oval shape at the back of the body to create the tail.
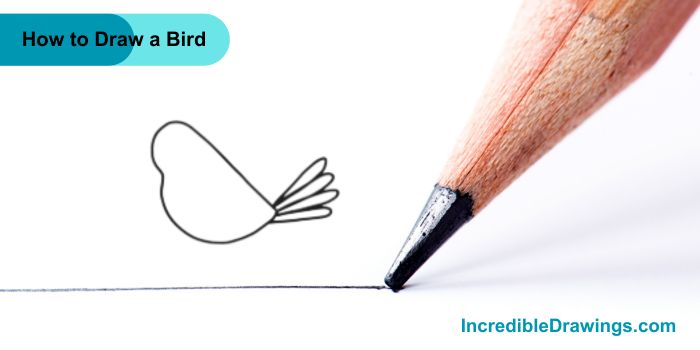
Step 4: Add Tail Feathers
- Now, draw several straight lines coming out from the tail to make the tail feathers. You can draw about 4-5 lines.
Step 5: Draw the Beak and Legs
- Draw a small triangle shape at the front of the head for the beak. Then, add two small legs at the bottom of the body.
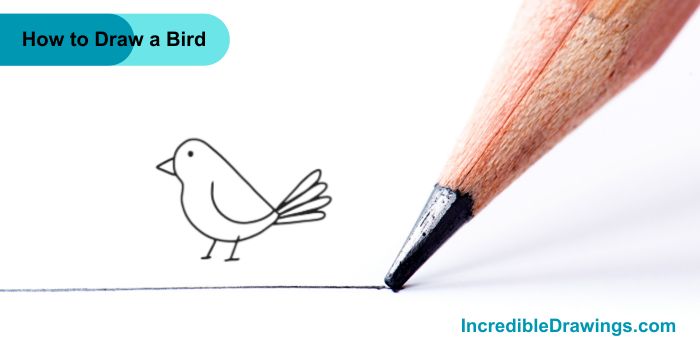
Step 6: Add the Eye and Wing
- Draw a small circle near the beak for the eye. Next, add a curved line on the body to make the wing.
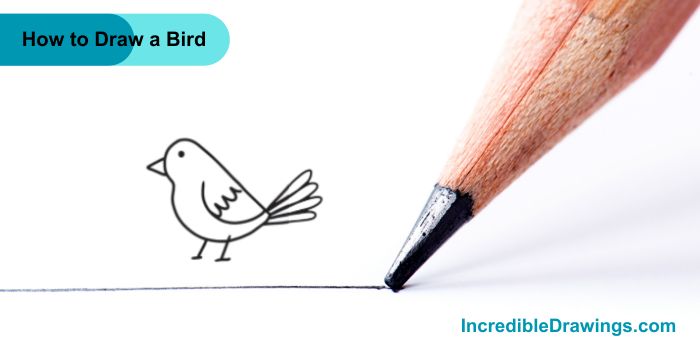
Step 7: Add Details to the Wing
- Draw a few more lines inside the wing to add details and make it look more like feathers.
Step 8: Complete the Drawing
- Finally, add any extra details you like, such as more feathers or a pattern on the body. You can also color your bird to make it look bright and cheerful.

Summary
You have now learned how to draw a bird in eight easy steps. Start with a simple outline, add details like the beak, legs, and feathers, and finish with the wing and eye.
The admin of IncredibleDrawings.com is an expert in creating step-by-step drawing tutorials for kids and artists. With over 4+ years of Experience, degree from Master of Fine Arts (MFA), I have cultivated a substantial following on YouTube, Pinterest, and Facebook, making art accessible to learners of all ages. Explore engaging drawing guides and tutorials on their YouTube channel with over 29k subscribers, follow inspiring content on Pinterest, with 100K Monthly views and connect with a vibrant artist community on Facebook with 2k+ likes.