Today, we’re going to learn how to draw a Motorcycle step by step. Follow along with the pictures, and you’ll have your Motorcycle drawing in no time.
Table of Contents
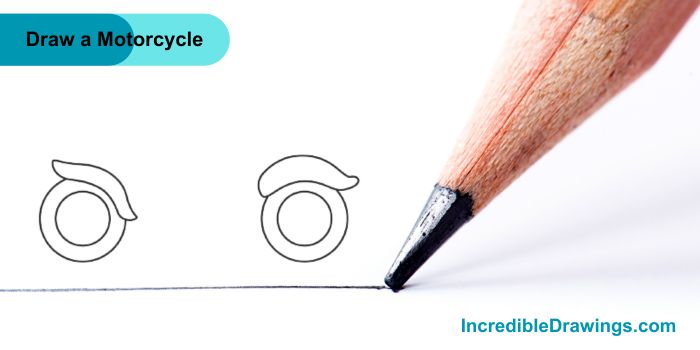
Step 1: Draw the Wheels
- Draw two big circles for the motorcycle’s wheels.
- Inside each big circle, draw a smaller circle.

Step 2: Draw the Platforms
- Above the front wheel, draw a long, curved shape with pointy ends.
- Draw a similar shape above the back wheel.
- These shapes are the platforms that cover the top of the wheels.

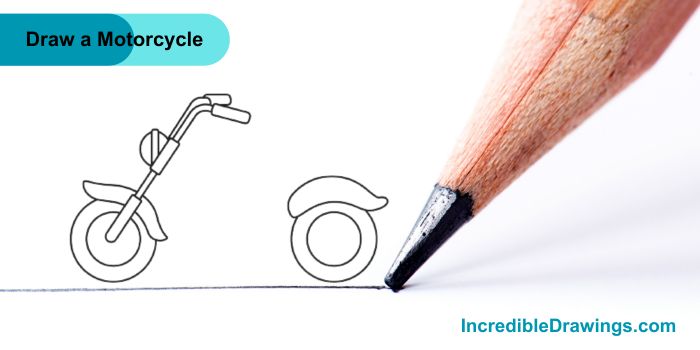
Step 3: Draw the Handle and Headlight
- Draw a slanted line coming out from the front wheel for the handle.
- Add bigger lines at the bottom, middle, and top of this slanted line to make the handle.
- Draw a half-circle on the right side of the handle for the headlight.
- Add two diagonal lines inside the headlight.

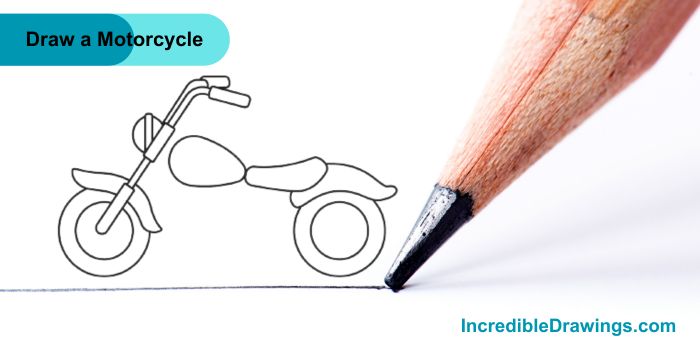
Step 4: Draw the Seat
- Draw a curved shape attached to the platform above the back wheel.
- This shape is the seat where the rider sits.

Step 5: Draw the Gas Tank
- Draw a sideways oval shape next to the seat.
- Make the left side of the oval wider and rounder, and the right side narrower and pointy.
- This is the gas tank of the motorcycle.

Step 6: Draw the Oil Tank and Tail Light
- Draw a tilted cube shape with rounded edges under the gas tank for the oil tank.
- For the tail light, draw a half-circle with two lines in the middle attached to the platform above the back wheel.

Step 7: Draw the Muffler
- Draw a long cone shape connected to the oil tank.
- The muffler should go from the oil tank to the back wheel.

Step 8: Draw the Body
- Draw two parallel lines connecting the handle and the oil tank.
- Draw another line connecting the oil tank and the platform above the back wheel.
- This completes the main body of the motorcycle.

Step 9: Add Details
- Draw small lines around the rims of the wheels.
- Add diagonal lines on the oil tank.
- Draw a few more small squares under the seat.

Final Step: Color Your Motorcycle
- Now that you’ve drawn the motorcycle, color it to make it look even better.

You can color it red and black like in the picture above. Remember, practice makes perfect. The more you draw, the better you’ll get. I hope you like drawing motorcycle with us in this step by step guide.
The admin of IncredibleDrawings.com is an expert in creating step-by-step drawing tutorials for kids and artists. With over 4+ years of Experience, degree from Master of Fine Arts (MFA), I have cultivated a substantial following on YouTube, Pinterest, and Facebook, making art accessible to learners of all ages. Explore engaging drawing guides and tutorials on their YouTube channel with over 29k subscribers, follow inspiring content on Pinterest, with 100K Monthly views and connect with a vibrant artist community on Facebook with 2k+ likes.


