Drawing a fire might seem tricky, but with this step by step guide on how to draw fire, you’ll be able to draw a realistic flame in no time, Follow the steps below and look at each image to guide you through the process.
Table of Contents
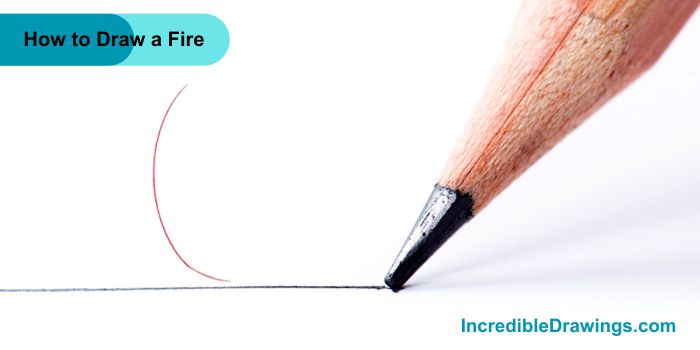
Step 1: Draw the First Curve
- Start by drawing a long, curved line. This line will form one side of the flame. Make sure the curve is smooth and resembles the side of a teardrop.
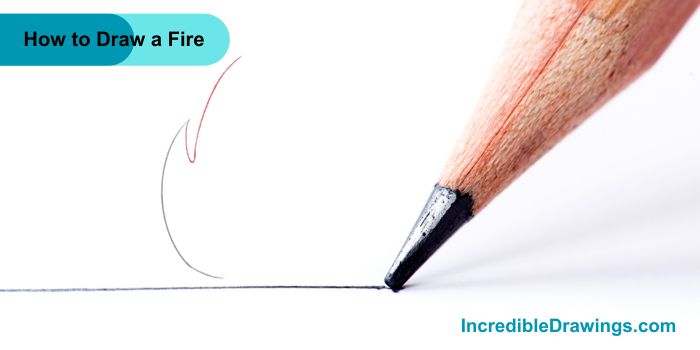
Step 2: Add the Second Curve
- Next, draw another curved line from the top of the first line. This new line should form the right side of the flame, curving inward and then outward to create a point at the top.
Step 3: Define the Inner Flame
- Connect the two curved lines at the bottom with a smooth, rounded line. Now, you have the basic outline of the flame.

Step 4: Add Another Inner Flame
- Draw a smaller flame shape inside the first one. Start at the top and make it look like a smaller version of the outer flame. This inner flame adds detail and makes the fire look more realistic.

Step 5: Draw the Smallest Inner Flame
- Add another smaller flame inside the second one. This will give your fire drawing more depth and make it look lively.

Step 6: Finalize the Flame Outline
- Draw the smallest flame inside the second one. This tiny flame should be simple and rounder.

Step 7: Color Your Flame
- Now that you have the outline of your flame, you can start coloring it. Use yellow for the innermost flame, orange for the middle flame, and red for the outer flame. This will give your fire a realistic, vibrant look.

And that’s it, You’ve successfully drawn a fire. Great job, Keep practicing to improve your drawing skills and try adding different colors to make your flame look even more interesting. I hope you like drawing fire with us.
The admin of IncredibleDrawings.com is an expert in creating step-by-step drawing tutorials for kids and artists. With over 4+ years of Experience, degree from Master of Fine Arts (MFA), I have cultivated a substantial following on YouTube, Pinterest, and Facebook, making art accessible to learners of all ages. Explore engaging drawing guides and tutorials on their YouTube channel with over 29k subscribers, follow inspiring content on Pinterest, with 100K Monthly views and connect with a vibrant artist community on Facebook with 2k+ likes.